Start with one icing and one small goal
A common decorating mistake is trying a new icing, several piping tips and an elaborate design at the same time. When something goes wrong, it is hard to tell whether the texture, tool or technique caused it. For a first attempt, choose one icing you can prepare comfortably and one repeatable design, such as dots, lines or a simple border. Work on a few cookies or one small area of a cake before committing to the whole batch.
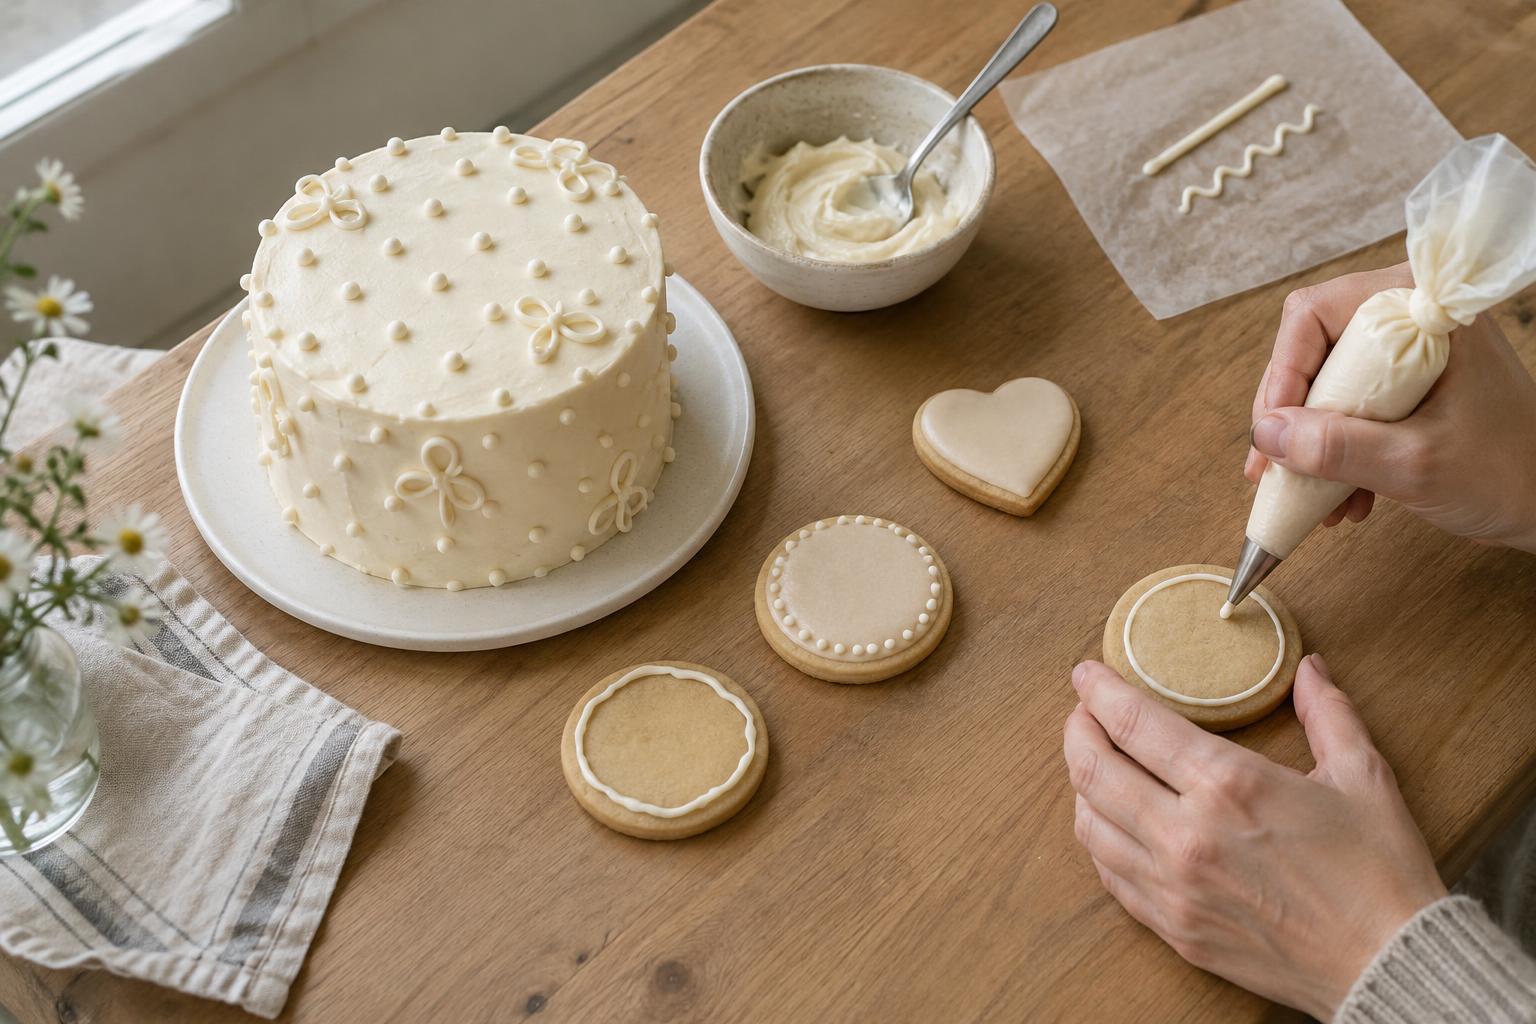
Set out your tools before filling a piping bag: a spoon for stirring, a small bowl for adjustments and a plate or piece of baking paper for testing. If you are decorating a cake, let it cool completely first. Warm surfaces can soften icing and turn a tidy plan into a sliding one. A simple setup gives you room to notice and correct problems without rushing.
Adjust consistency in small steps
Icing that is too stiff may break into uneven lines or require so much pressure that your hand tires quickly. Icing that is too loose may spread beyond an outline or lose the shape of a piped dot. Rather than relying only on a recipe’s description, lift a spoonful and watch how it falls back into the bowl. For lines and borders, aim for a texture that moves through your piping opening smoothly while holding its shape on the test surface. For a flat fill, the icing needs to settle more readily.
Make changes gradually. Add liquid a few drops at a time to loosen icing, then stir thoroughly and test again. To thicken it, mix in a little more of the dry ingredient used in your icing recipe. Scrape the sides and bottom of the bowl so the texture is even. Keep the bowl covered between tests; icing exposed to air can form a crust that creates lumps or blocks a small piping opening.
Test the flow before decorating
Filling a bag and going straight to the finished bake is tempting, but a short test can prevent repeated errors. Pipe a line, a curve and three dots onto baking paper. If the line breaks, check for a clogged opening, air pockets or icing that is too stiff. If it spreads noticeably after you stop piping, the icing may be too loose for that particular design. Adjust one thing, then repeat the same test so you can see whether it helped.
Avoid overfilling the piping bag. A partly filled bag is easier to grip and control, especially when you are learning. Twist or fold the top to keep icing from escaping, and use steady, modest pressure rather than squeezing harder to force out thick icing. Hold the opening just above the surface for lines, then lower it to finish the stroke. These small movements are easier to practice on a spare surface than on the final cookie or cake.
Give simple designs enough space
Another common mistake is adding details until a design looks crowded. Choose a limited set of marks that you can make consistently: dots around an edge, short lines in a repeating pattern or a plain outline with a filled center. Leave visible space between elements. It makes minor variations less noticeable and reduces the chance that neighboring marks will merge.
For cookies, you might outline one shape, fill it with icing suited to settling flat, and add a few dots only after the base is firm enough to support them. For a cake, a row of dots or a gently uneven border can be more manageable than a written message. If you want lettering, sketch the placement on paper first and check that the words fit. Practice the letters at roughly the same size before piping them onto the cake.
Correct what you can, then move on
Not every uneven line needs repair. Trying to wipe away a fresh mark can spread color or damage the surface underneath. If a dot lands in the wrong place, consider repeating it elsewhere so it becomes part of the pattern. If an outline is clearly too runny, pause and adjust the icing before continuing. Letting one area set while you work on another is often more useful than repeatedly touching the same spot.
After each session, note one observation you can use next time: how the icing behaved, how full the bag felt or which design was easiest to repeat. Decorating is a hands-on skill, and a small, finished batch teaches more than an ambitious design you cannot comfortably control. Aim for clear shapes and a workable process rather than perfect symmetry.