Start with a small, repeatable setup
You do not need a large collection of supplies to learn watercolor control. Choose one color, a medium brush, a cup of clean water, a cloth or paper towel, and watercolor paper. Paper matters because it must tolerate some water; thin paper may buckle quickly and make the paint harder to judge. Work on a small area so you can see changes before they dry.
Before painting, notice how much water your brush holds. Dip it, then touch it once to the edge of the cup. Make a mark. Next, blot the brush lightly on your cloth and make another mark. The first may spread more freely; the second may leave a darker, more defined stroke. This is a useful habit: adjust the brush before it touches the page, rather than trying to correct every mark afterward.
Learn to read the shine on the paper
Watercolor behaves differently on dry, damp, and very wet paper. On dry paper, a stroke usually keeps a clearer edge. On damp paper, its edge softens as pigment moves outward. On very wet paper, color can travel unpredictably and settle unevenly. None of these effects is a mistake by itself. The skill is choosing the condition that suits the mark you want.
Draw three small rectangles in pencil. Leave the first dry, brush clean water across the second, and wet the third more generously. Add a short stroke of the same color to each. Watch what happens for a minute or two. If water pools visibly in the third rectangle, touch the corner of a clean, blotted brush to the pool to lift some of it. Repeat the exercise later with less water. You will begin to recognize the difference between a gentle sheen and a puddle.
Control color by changing the mixture
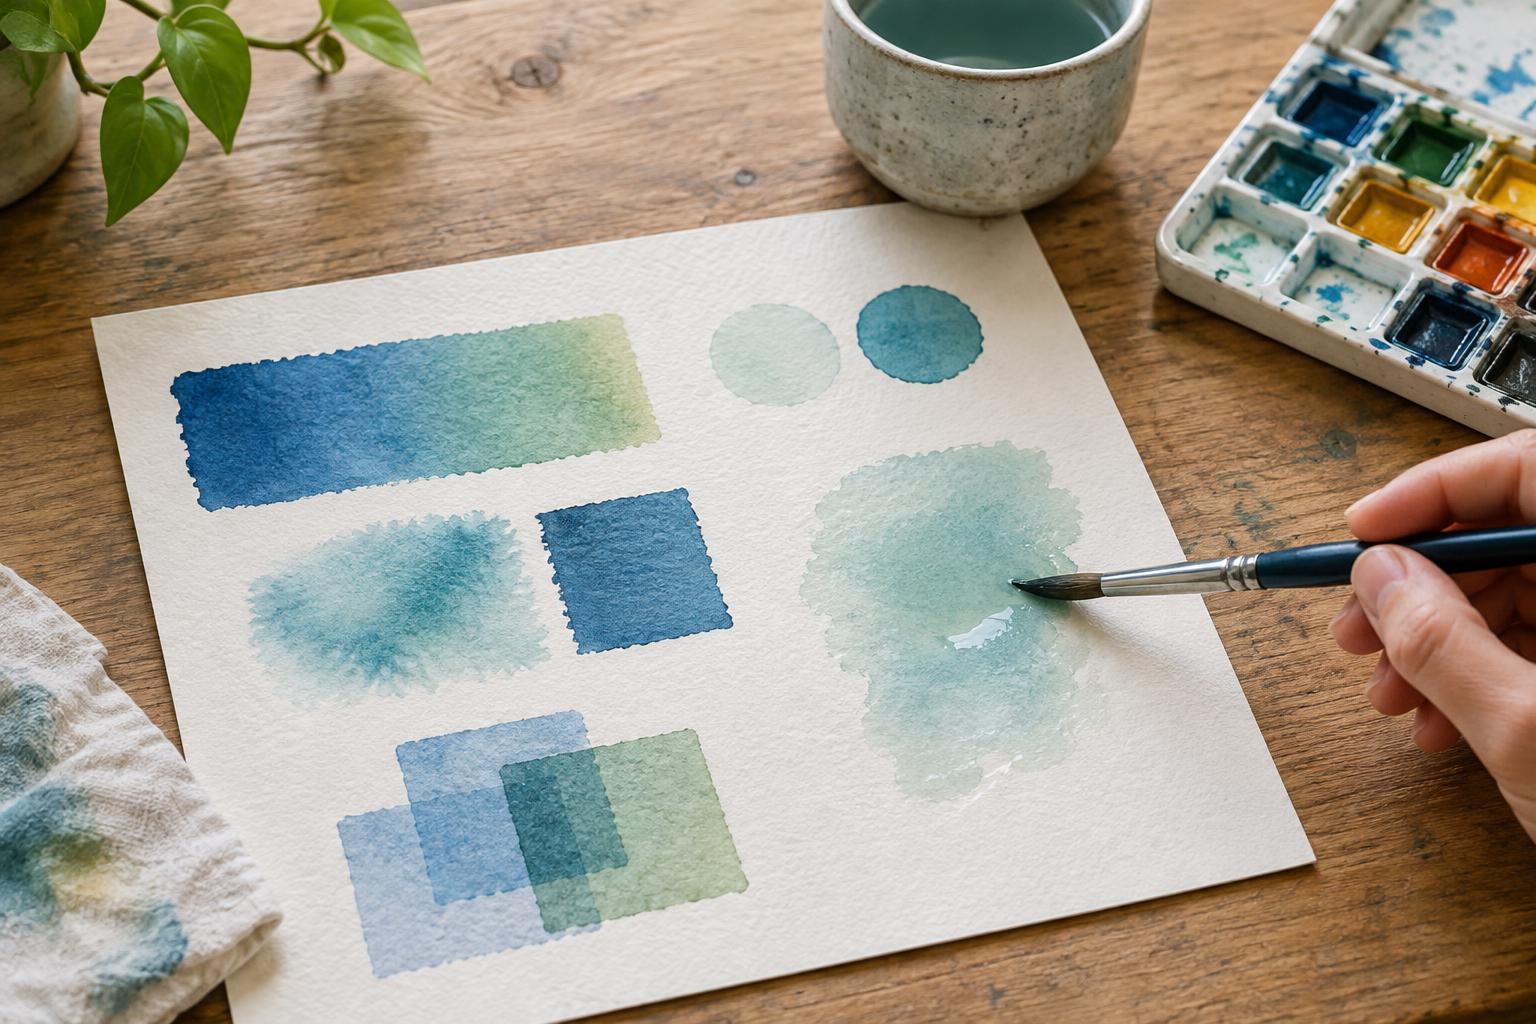
A pale wash is not simply a dark wash spread farther. It begins with a more diluted mixture. In a palette well or small dish, mix a little pigment with water until the color looks light on the brush. Paint a square, then add more pigment to the mixture and paint a second square beside it. Make several squares, changing only the mixture each time. This gives you a practical range of values from one color.
Keep the amount of liquid on the brush in mind as you work. A brush loaded with watery paint can flood a small shape, even if the color itself is pale. For a smooth wash, mix enough paint before you start, tilt the paper slightly if comfortable, and move steadily across the shape while the previous stroke is still wet. If you stop and return after part of it has dried, the overlap may leave a visible line. Try a second wash deliberately slower so you can see where that line forms.
Use drying time to choose soft or sharp edges
A new stroke placed next to wet paint can blend with it. The same stroke placed next to dry paint can form a distinct boundary. To practice both, paint two circles with a light wash. While the first is still shiny, touch a darker color to one side. Let the second circle dry until it no longer feels cool or damp, then add the darker color. Compare the edges rather than judging which circle looks better.
Layering over dry paint is often called glazing. It can deepen a color or create a new shape while allowing some of the earlier wash to show through. Let the first layer dry fully before adding the next, and use a light touch so you do not disturb it more than necessary. If you are unsure whether the paper is ready, wait longer. Timing varies with the paper, the amount of water, and the room, so observation is more useful than a fixed number of minutes.
Turn surprises into useful feedback
Watercolor sometimes makes a spreading mark when fresh water enters a wash that has started to dry. It may also leave a darker rim where liquid collects at an edge. When either happens, pause before trying to scrub it away. Ask what the paper looked like just before the mark appeared: shiny, damp, or nearly dry? Was the brush wetter than the surface? Those observations tell you what to change on the next attempt.
Finish a practice session by making one small study with three goals: a pale area, a darker area, and both a soft and a sharp edge. It could be a leaf, a simple cup, or an arrangement of abstract shapes. Let it dry, then note one effect you could repeat and one you would approach differently. A few small studies like this teach more control than trying to rescue a single painting indefinitely.